

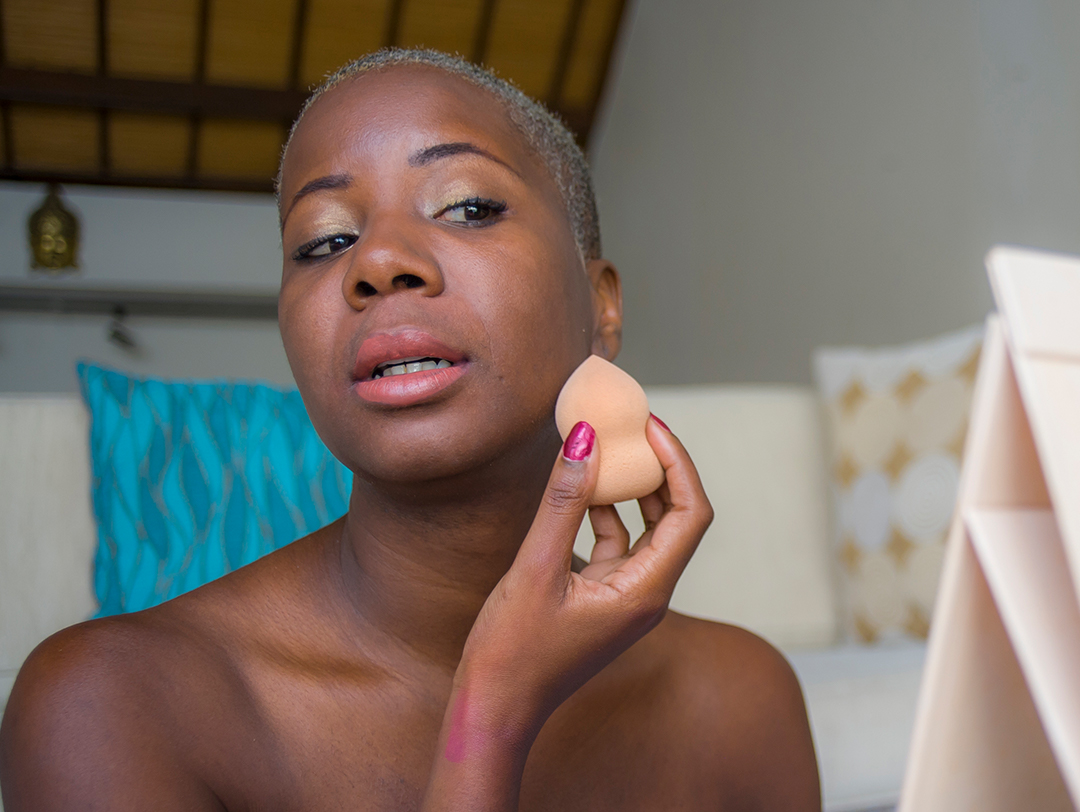
How to use Makeup Sponges - Tips & Tricks
How to Use a Makeup Sponge for a Flawless Finish Every Time
For something so simple, a good makeup sponge is arguably one of the most valuable beauty tools you can have in your makeup bag. We always say that both skincare prep and how you apply your products can make or break your makeup look. It’s true that having a quality makeup sponge can give you the flawless Instagram-filter finish everyone wants, and the best sponges can help you lay down a smooth base—whether your product of choice is a liquid, powder, and cream.
Although you may think it's only useful when you want to apply liquid foundation, the truth is, you can use this makeup tool for multiple important makeup steps—from applying face makeup like BB cream or tinted moisturizer, to more complex steps like contouring. Who knows, this versatile tool may eventually have you swearing off makeup brushes for good—or at least reaching for them less.
“I love to use a makeup sponge because it blends the products into the skin without any streaks,” says Carissa Ferreri, an LA-based celebrity makeup artist. “The finish looks like real skin—not like makeup is sitting on top of your skin.”
As simple as this tool is, finding the right one for you and knowing how to use it correctly can make a world of difference. Luckily, we're here to help you on both fronts. Continue reading below to discover everything you need to know about using a makeup sponge like a pro, including a step-by-step guide.
About the Experts:
Carissa Ferreri is a celebrity makeup artist and groomer based in Los Angeles. Her clients include Suki Waterhouse, Gina Rodriguez, Ansel Elgort, Cole Sprouse, and more. Follow her work on her Instagram @carissaferreri.
Alex Levy is a New York–based makeup artist and beauty marketing consultant. You can catch his work behind the scenes at NYFW, editorial shoots, and on the famous TikTok duo @young_emperors.
How to Choose a Makeup Sponge
Hit up your local beauty store and you'll quickly find that makeup sponges come in a variety of different shapes, sizes, and colors. These variations aren't just for show. Typically, the differences indicate their purpose, with different advantages on certain makeup tasks. Here's a quick guide to a few of the most popular makeup sponge shapes:
1. Teardrop
If you’ve never used a sponge before or if you're looking for a do-it-all option, a teardrop-shaped sponge (like the ORIGINAL BEAUTYBLENDER Makeup Sponge) is the perfect place to start. Ferreri recommends using the big, rounded end for larger areas of the face that you usually cover when you're applying liquid foundation, a cream blush, or a bronzer. “I also like to use it to blot any excess product off—leaving just the right amount of product on the skin,” she adds.
“The tip of the makeup sponge is perfect to blend hard-to-reach spaces, such as the inner corner of the eyes, around the nose, and underneath any elongated eyeliner to enhance sharpness,” says Ferreri. “I also like to use the tip for setting powder in the T-zone. This gives me a lot of control as to where I’m placing the powder to manage shine.” That’s right, you can use this sponge with powders, too!
2. Teardrop With Flat Edge
Some teardrop-shaped makeup sponges feature a flat side (like the HUDA BEAUTY The Basic B Sponge Applicator). Ferreri says she likes to use the flat side to press and blend concealer. She also likes using it to apply powder under-eye concealer to prevent creasing.
“Anything with both a rounded and more pointed edge to cover surface area as well as blend around harder-to-reach areas of the face like in the corners of the eyes or along the nose,” says Alex.
When it comes to stippling and blending contour or bronzer, a makeup sponge with a flat edge can be a total game-changer, making it easy to sculpt areas like the cheekbones, jawline, and neck.
3. Pear-Shaped
Pear-shaped makeup sponges like the SLMISSGLAM Sparkle Everyday Glam Beauty Sponge feature a unique hourglass-like silhouette. While it may look similar to the traditional teardrop-shape sponge, this cinched design allows for a better grip, giving you more control over your application. It works well with liquids as well as powders, and we especially love using it to apply highlighter and cream blush. In a nutshell, this is the makeup sponge you should be reaching for on those nights when only a red-carpet-worthy look will do.
4. Oval
If you’re using a makeup sponge to apply concealer, then a smaller, more precise blending sponge (like the E.L.F. Camo Concealer Sponge) is what you should reach for. The dual tips allow for a precise finish, and because of the small shape, these tiny oval sponges are great for reaching small crevices, such as your under-eyes and around your nostrils.
How to Apply Foundation with a Sponge
Step 1: Wet Your Sponge
Now that you’ve picked out the perfect sponge, let’s get down to business. The first thing you’ll want to do is fully immerse your sponge in water. Squeeze a few times to allow the sponge to fully absorb the water. Then, thoroughly wring out to remove any excess water (you’ll know it’s ready when it’s grown about double its original size).
Why wet your sponge? A dry sponge is super absorbent, so wetting the sponge ensures the product won’t get all soaked up by the tool before it reaches your face. “Dampening a sponge will add a bit of moisture to the application, preventing the product from being too heavily absorbed into the sponge. Use patting, stippling motions to blend seamlessly rather than wiping along the skin, which could leave streaks or disturb the texture of the makeup too much,” says Alex.
Not only will it save you from wasting any product, but it’ll make your makeup application more even and smooth with a streak-free, flawless finish. That being said, squeezing out your sponge is just as important as wetting it, because too much water can dilute your product, or alter the formula's texture, which can lead to a cakey-looking finish.
Pro tip: “After the beauty sponge is damp, I like to generously spray a facial mist or essence throughout the makeup sponge as well,” says Ferreri. “This adds moisture and refreshes the skin. It also feels and smells so nice and you get the added benefits from the facial mist infused into your makeup products.”
Step 2: Dot and Dab
Now that your sponge is damp, dot your foundation evenly around the face. Once the product is distributed, you're ready to blend.
Rather than swiping the sponge across the face, you're going to use the large side of the sponge to gently bounce, dab, and roll out the coverage all over. “It’s best to use a stippling motion,” advises Ferreri. “This means to bounce the sponge in tiny movements over your skin, diffusing the products for a look free of any streaks and demarcations.” This gentle dabbing motion is the best way to create an even texture that closely resembles super smooth, real-looking skin.
“There are many different methods of application, but I find that the most useful way to create a seamless blend is to first apply foundation separately (either with a brush or fingers) to areas that need the most coverage, and use the sponge to soften edges and spread product along the face,” says Alex.
Personally, I like to apply my CALIRAY Skin Tint directly on my skin, rub it with my fingers (like a moisturizer), and follow up with my BEAUTYBLENDER to blend everything in and get in any small crevices.
If you’ve spent years applying makeup with a foundation brush, it might be hard to break out of the habit of swiping when using a sponge, but if you drag instead of dab, you won’t get that effortless, airbrushed finish that this tool is famous for. Instead of creating a natural, buildable finish, you’ll just be moving the product around. It might seem more time-consuming at first, but trust us—it’ll be totally worth it once you master that glowy, flawless look.
How to Use Concealer With a Makeup Sponge
After laying down your foundation base, you’re ready to move on to concealer. Using a small spot on your oval-shaped sponge, dab a small amount of concealer under your eyes and around your nose, then use the small tip to gently blend it in. The same blending rules apply here; be sure to stipple, not swipe.
Pro tip: If you’re planning on contouring after, try applying your concealer in a V-shape under your eyes. This will add dimension to your cheekbones and give your eyes a lifted look.
How to Contour with a Makeup Sponge
To contour with your makeup sponge, try using a cream or liquid foundation that's two shades darker than your skin tone. Move onto this step after you’ve already applied your base and concealer. Apply the product to your face, focusing on the areas where you want to create more depth and definition. Not sure where to apply contour? Check out our full tutorial here.
Next, use a stippling motion to gently dab and blend until you've reached the effect you want. If you have a makeup sponge with a flat side, this can do wonders to easily create definition. And remember, it might be tempting to blend like you would normally, but always dab in short, light strokes until you can’t see any harsh lines.
How to Use a Makeup Sponge for Blush and Highlighter
Did you know you can also use a makeup sponge for blush and highlighter?
If you're working with a powder formula, you'll want to lightly dab the big, rounded end of a damp teardrop-shape sponge into the product so that it gets picked up onto the sponge. Then lightly stipple the product onto the apples of your cheeks (or wherever blush best suits your face shape) until you've achieved that soft, rosy glow. If you're using a cream formula like the GLOSSIER Cloud Paint, try applying it the same way you would foundation; dot it onto the skin and blend using the rounded end of the sponge.
When applying highlighter with a makeup sponge, you'll want to flip that sponge around to use the pointed end for a more precise application. If you're using a powder, you'll dip the damp sponge into the product and dab it onto any areas that you'd like to highlight. If you're using a liquid highlighter, you'll again apply it directly to the skin and blend using the sponge.
For areas that require a more precise application like this, you might also consider using a mini makeup sponge like the BEAUTYBLENDER Micro Mini Makeup Sponge.
Pro tip: Using a sponge with a bit of your complexion product on it to blend other makeup can create a seamless transition. “If I use a sponge to apply foundation, and then use it to apply a cream blush, having some of that leftover foundation on the sponge will soften the color to match the tone of your skin, creating a more natural effect,” adds Alex.
Tips for Caring for Your Makeup Sponge
Since you’re constantly wetting your makeup sponge and dabbing it across your face, it can quickly become a petri dish for dirt and mold, which is why sanitation and maintenance is key. By properly and frequently cleaning your sponges, you'll also reduce the risk of breakouts and stretch the shelf-life of your makeup sponge. “Especially because the sponge is moist with water and product, it becomes a breeding ground for bacteria,” says Alex.
How to Clean Your Makeup Sponge
While there are a slew of cleansers on the market dedicated to makeup sponges, an gentle soap and warm water will work wonders on your dirty sponge. You can also use your everyday cleanser or even a gentle shampoo.
To clean the sponge, simply apply a small amount of soap or cleanser in the palm of your hand and gently swirl the makeup sponge in it, slowly adding a little water to the mix until it works up to a lather. Once you've massaged the soap into all sides of the sponge, thoroughly rinse it out under warm water. Be sure to squeeze it out until no suds are left. Once all traces of soap are gone and the water runs clear, allow it to dry completely before putting it back in your makeup bag or case.
It's also recommended to keep your dry sponge in a clean, separate case so that it's not bopping freely around in your makeup bag and picking up traces of dirt and bacteria.
How Often Should You Clean Your Makeup Sponge?
The best way to keep dust, dirt, and grime off your beauty sponge is by cleaning it after each and every use. While diligent daily cleansing is key, you still shouldn’t hold onto the same makeup sponge forever. Just like your toothbrush, you’ll want to replace your makeup sponge every three months (aka every time a new season strikes).
By keeping your sponge clean and fresh, you'll have the best chance of mastering that flawless finish time and time again.
Want to find all the best beauty products for your makeup routine? Or learn new makeup tips from experts? Take our Beauty Quiz now to get started. Already an Ipster? Refer your friends to earn points, which you can use toward products. Either way, don’t forget to check us out on Instagram and Twitter @IPSY.
Like this article? Share it with your friends by clicking the icons below!